MIMIC - 1997
I was introduced to Guillermo del Toro by writer/director Matthew Robbins in the spring of 1995 when I was a Visual Effects Art Director at Lucasfilm's Industrial Light & Magic, then located in San Rafael, California (in 2005, ILM moved to the Presidio of San Francisco, California).
At that point in time, Guillermo -- building on acclaim for his first feature film Cronos -- was in the process of setting up his first Hollywood picture, Mimic, at Miramax films.
In a nutshell, Mimic is a horror film which revolves around the idea that scientists working to save mankind from a horrible plague inadvertently create a race of human size insects capable of, like many insects in the wild, imitating their most dangerous predator; in this case man.
Shortly after our introduction and Guillermo's review of my work, he invited me to join the film as lead Creature Designer and I accepted.
I worked on Mimic for the better part of a year and a half. The first few months focused on the design of the insect creatures, the remainder I spent art directing the sculpting and fabrication of the full scale animatronic creature used in the shooting of the picture.
What follows is a sampling of drawings and photos from throughout the production. Please note: relevant text will appear above the image and a mouse click will open a larger version of the work or provide access to alternative studies, versions, or views.
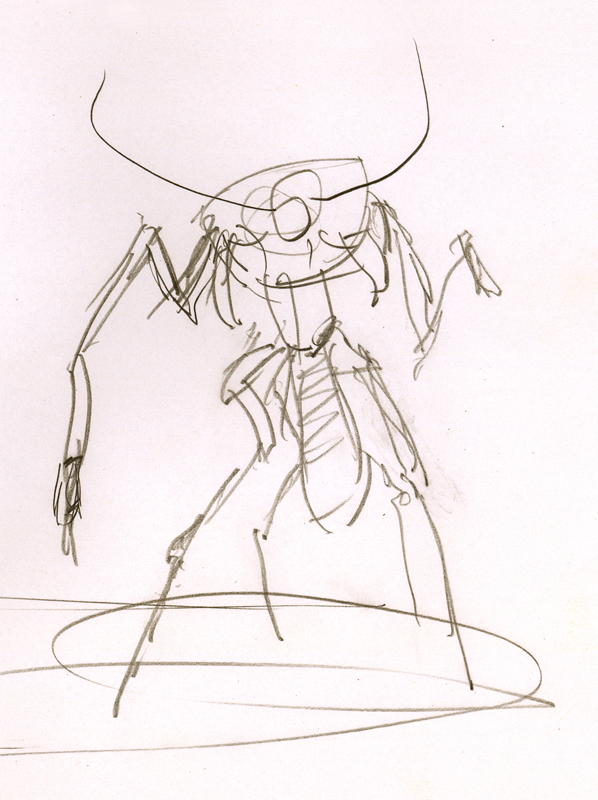
EARLY MIMIC GESTURE SKETCH
Below is a very early thumbnail I sketched out in one of my first meetings with Guillermo pertaining to Mimic. I share it because it underscores the value of "gesture drawing" and quick sketching, two practices I feel are of high value to me as a designer and which trace directly back to my fine art education. This sketch rendered in ballpoint pen on 8.5" x 11" copy paper.
MIMIC CONCEPT DEVELOPMENT DRAWINGS
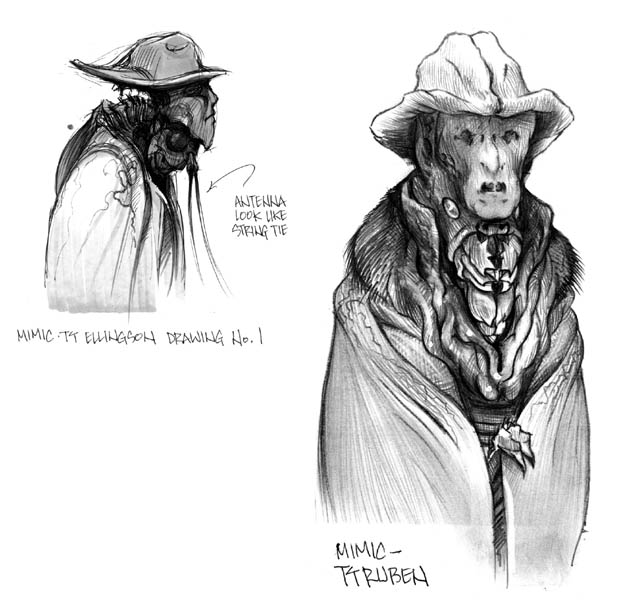
From the very beginning, it was decided that the mimic creature's ability to pass itself off as a human would be exclusively a function of its biology. A cleverly placed appendage could, in the shadows of evening, appear as a face, or a turned wing resemble a homeless man's tattered overcoat.
Early on Guillermo was fond of the idea that, when incognito, a portion of the insect's head would take on the shape of a man wearing a wide brimmed hat. This drawing is one attempt to realize the concept. It was rendered in ballpoint pen and gray tone design marker on 8.5" x 11" copy paper.
Early on Guillermo was fond of the idea that, when incognito, a portion of the insect's head would take on the shape of a man wearing a wide brimmed hat. This drawing is one attempt to realize the concept. It was rendered in ballpoint pen and gray tone design marker on 8.5" x 11" copy paper.
As we moved forward with the design development curve, the brimmed hat idea was abandoned largely because so few people wear such hats anymore, and concern arose that this gave the mimic creature a bit too much of a whimsical vibe. On the heels of this decision, I produced this study of a simpler head and rendered it in a bit of the environment to set a more eerie mood.
This drawing was done in pencil on bright white color copy paper and measures 8.5" x 11".
This drawing was done in pencil on bright white color copy paper and measures 8.5" x 11".
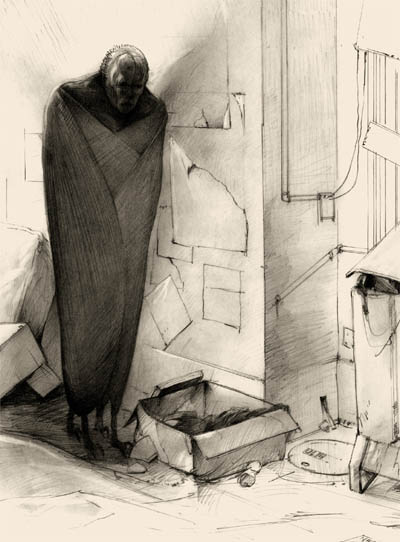
The sketch of the mimic in the alleyway above, though simple and monochromatic, really seemed to hit a proper chord for the picture -- yet the question remained, how exactly would a large insect take on this shape?
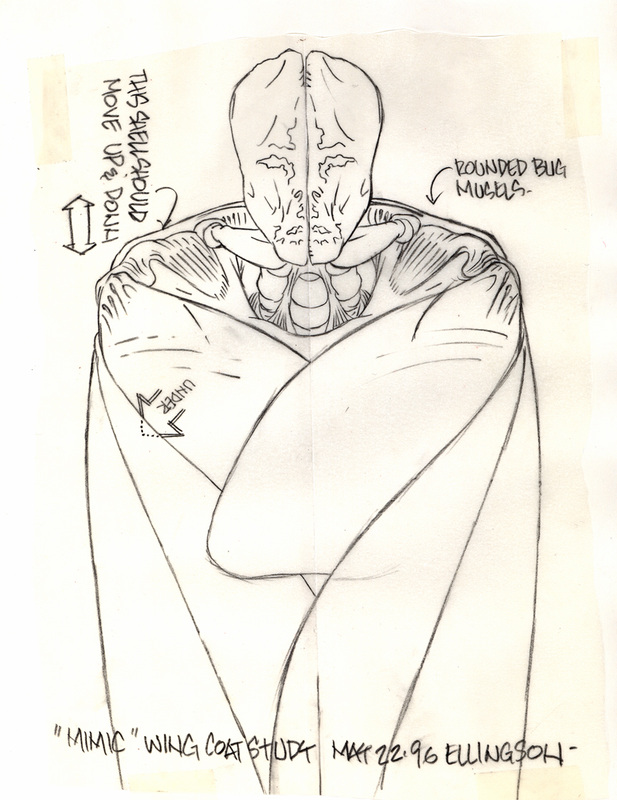
I explored a number of ideas as to how this kind of "biological disguise" could be accomplished. After some sketching and researching, the idea of a set of large mandibles with face like textures on the outer side of them was devised. These special "flux face mandibles" would be positioned up near the head at "the shoulders" and allow the creature to hold these special appendages up over its real insect head to create the illusion of a human head and face; an idea that we retained in various forms, until the completion of the final design.
This drawing was done in pen, design marker, colored pencil, and white correction fluid. It measures approximately 11" x 28" and rendered on copy paper.
MIMIC PEEK-A-BOO MANDIBLES
Reviewing the drawing above, Guillermo and I came around to the idea that it would be much scarier if the flux face mandibles could -- rather than just being held up in the air -- actually "cover up" the insect's face.
Once accomplished, when the creature was set to attack, this reveal of its biting jaws would be fast and unexpected -- the movement similar to that of what a parent does with a child when playing Peek-A-Boo.
The mechanics this concept would require were developed quickly with simple line drawings. The two examples below are taken from a larger set of possible solutions, each pencil on velum measuring 8.5" x 11"
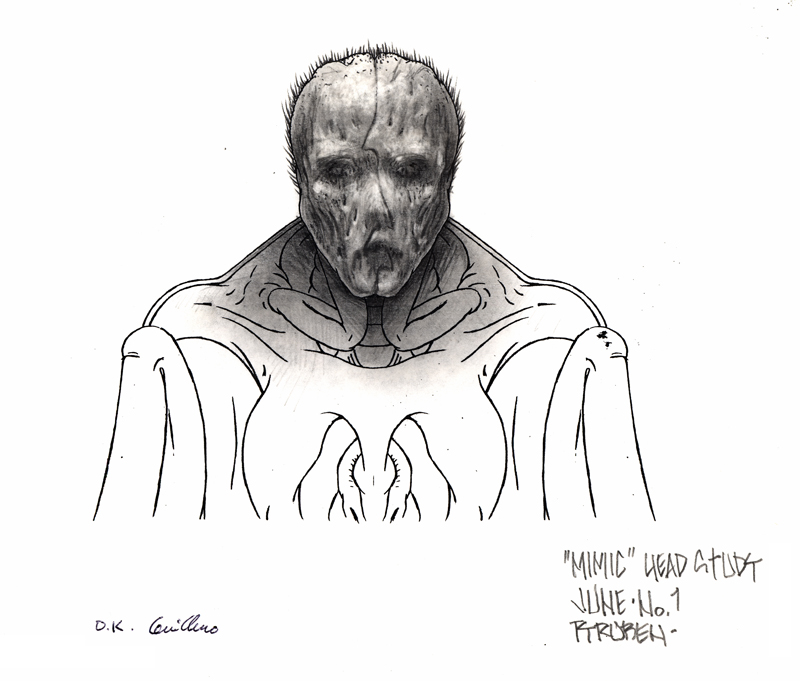
From the front of the creature, the earliest versions of the Peek-A-Boo mandibles (when closed over the insects true head) came together in two simple halves with a straight vertical joint between them, as shown below. This study was done in pencil on velum and measures 8.5" x 11".
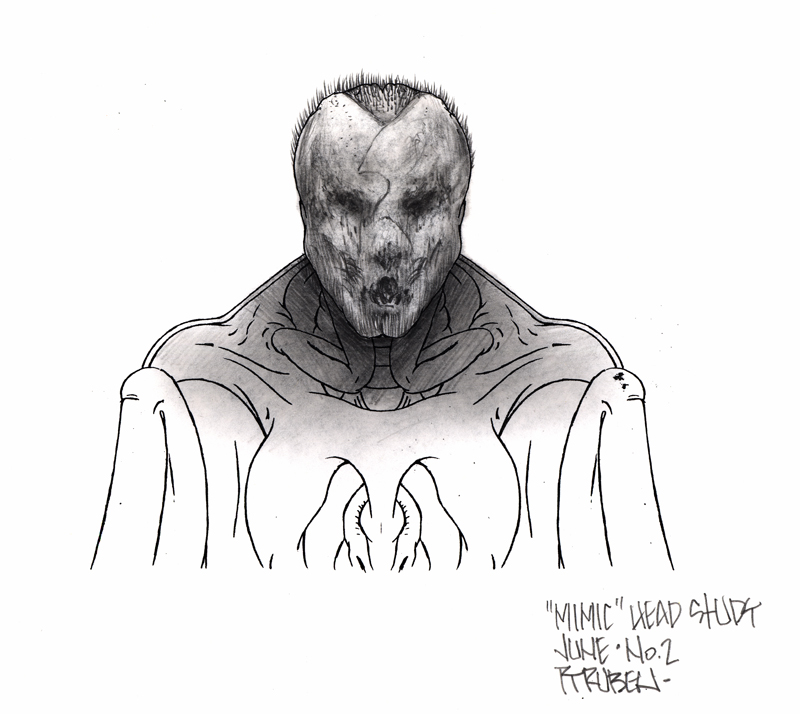
Later, this simple joint in the face evolved into something more jagged and organic. This simple adjustment not only allowed for the "face" on the mandibles to appear less symmetric like a Rorschach test, it increased the frightfulness and menace when the reveal of the insect head hidden inside was executed.
Below, a pair of studies from a larger series -- pen, pencil, and white correction fluid on 11" x 8.5" copy paper.
Below, a pair of studies from a larger series -- pen, pencil, and white correction fluid on 11" x 8.5" copy paper.
MIMIC DETAILING AND TRANSITION TO CLAY
While work on the design of the Peek-A-Boo mandibles and numerous other details continued, our larger production schedule required work begin on the actual full scale animatronic (a fully detailed and articulated puppet) required for shooting the picture. The group chosen to execute this task was The Character Shop located in Simi Valley, California.
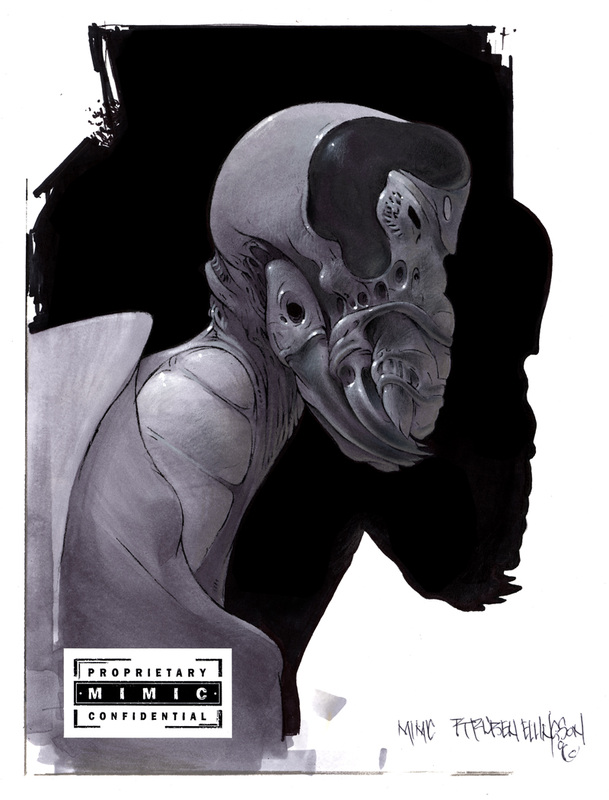
This next drawing is a side plan view study of the closed Peek-A-Boo mandibles. It was done in pen, design marker, white pencil, and white correction fluid. The render measures 8.5" x 11" and executed on copy paper.
This next drawing is a side plan view study of the closed Peek-A-Boo mandibles. It was done in pen, design marker, white pencil, and white correction fluid. The render measures 8.5" x 11" and executed on copy paper.

The same view, but with the Peek-A-Boo mandibles removed -- pen, design marker, white pencil, and white correction fluid. The render measures 8.5" x 11" and executed on copy paper.
A good deal of my work in the film industry has involved taking on the roll of art director, working with and guiding a larger group of artists and/or technicians. This is a skill that has been invaluable to me and one I feel all designers should be made aware of, participate in, and make a permanent part of their professional tool set.
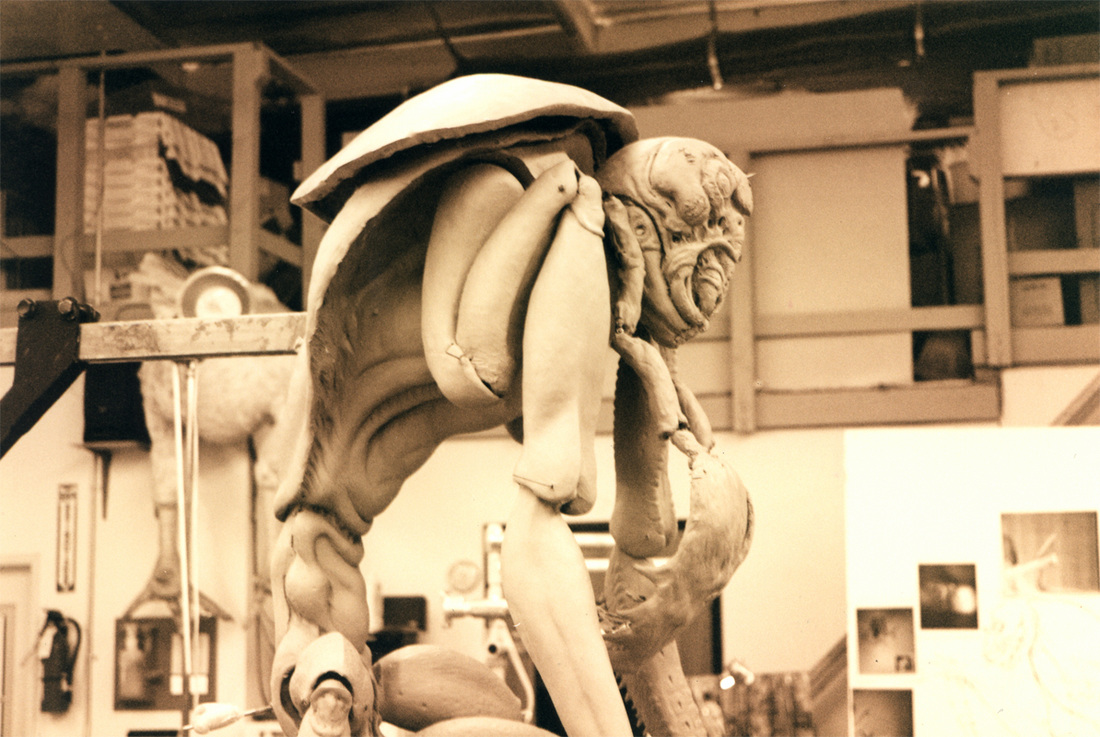
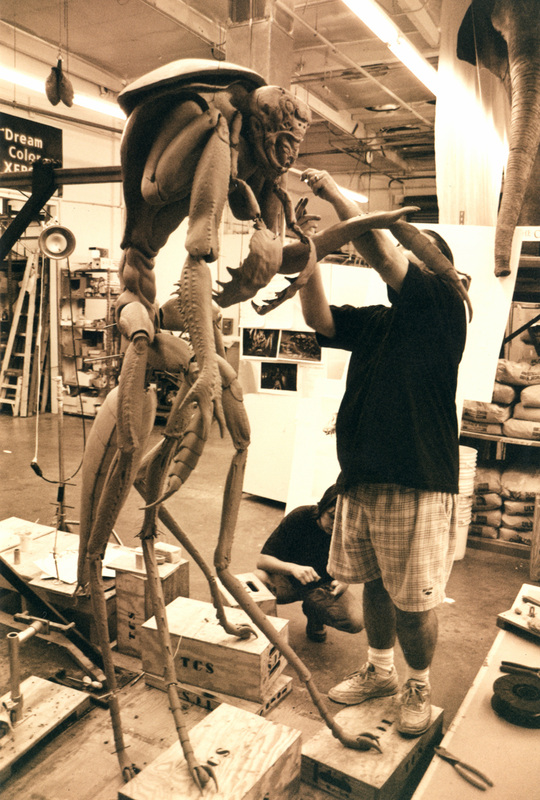
Moving away from the drawing board, I spent a great deal of time building quality relationships with the in-shop personnel, answering questions, providing direction, as well as reporting in to the director with updates and my global perspective on progress.
Below, an in-shop photo of work in progress on the full size animatronic, constructed with professional modeling clay on a welded steel armature.
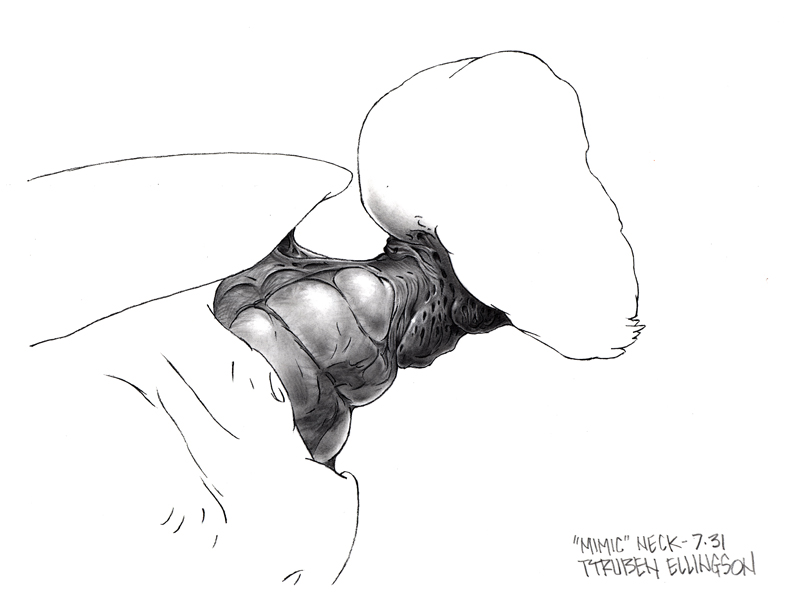
From very early in the project, Guillermo had always talked about wanting the creatures real head to be able to spring forward away from the body when attacking it's prey. With the clay sculpt now under way, I returned to this idea and provided the team the drawing below, a detailed study of the creature's extended neck. This study was done in pen, design marker, pencil, and white correction fluid. The render measures 11" x 8.5" and executed on copy paper.
As we moved from one area of the body to another during the sculpting of the creature, I would provide guidance drawings as needed. What follows is a select few from a larger catalog of such studies.
Tail end detail -- pen, design marker, white pencil, and white correction fluid. The render measures 8.5" x 11" and executed on copy paper.
Tail end detail -- pen, design marker, white pencil, and white correction fluid. The render measures 8.5" x 11" and executed on copy paper.
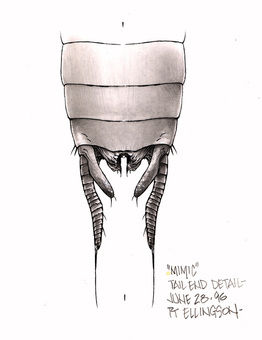
The drawing above created in response to questions pertaining to the bottom of this tail sculpt.

Reflecting on early sculpting of the creature's chest, an area of the body which had always been thought of as being a hard shell, Guillermo raised a concern about it being too simple in form. As is often the case when taking a concept from flat artwork to three dimensions, one finds that adjustments are required. After a brainstorming meeting in which we dramatically lit the clay sculpture and viewed it through a camera, we concluded there was room for improvement.
After a series of sketches, I developed this drawing in which I proposed creating a kind of "meaty gill" pathway into the creature which transitioned down into a more pupa-like organic abdomen. This solution pleased the director and alleviated his simplicity concerns. Though the concept evolved as the sculpting proceeded, this drawing became the touchstone for the change in direction.
This drawing was done in pencil on bright white color copy paper and measures 7" x 17".

The following study was done to provide texture details to the sculpting team. Pencil and white correction fluid on copy paper -- render measures 8.5" x 11".
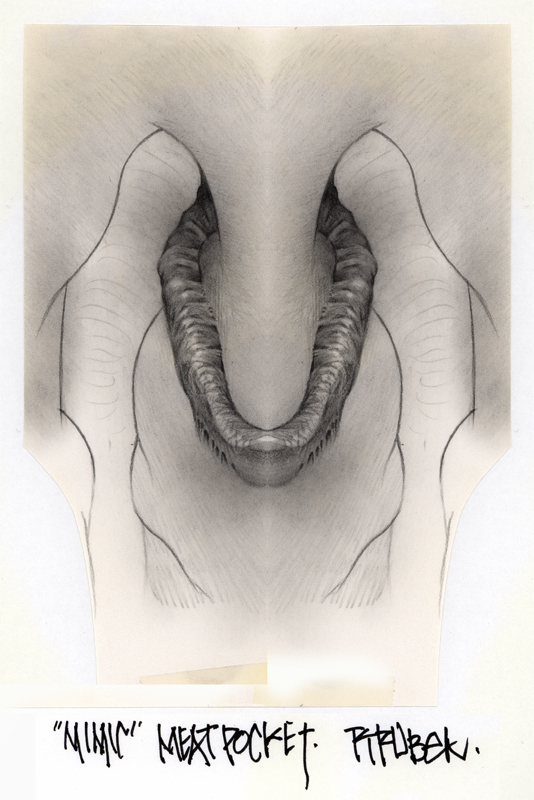
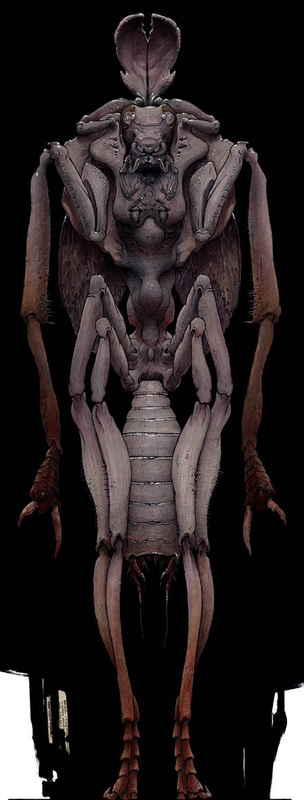
Photo of final chest sculpture with detailing complete. Professional modeling clay on a welded steel armature.
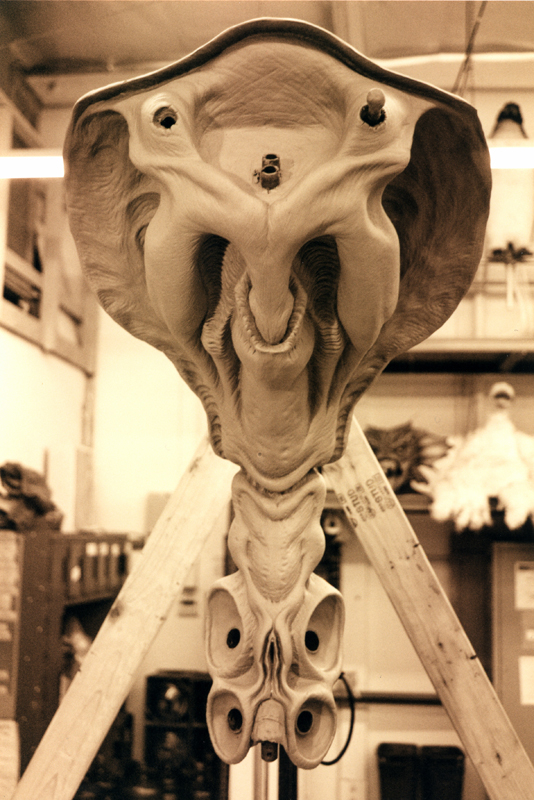
One of the last photos I shot of the full-scale sculpt of the mimic creature. Shortly after this photos was snapped, the cleverly constructed steel armature upon which the clay is sculpted is disassembled and each piece is carefully molded. Professional modeling clay on a welded steel armature.
Though I continued to provide art direction with regards to the color palette and painting details as the final articulated animatronic prop was completed - a process that went on for another two months - the photo above marks the point where I stepped away from the structural design of the mimic to focus on other tasks the production required.
All and all, Mimic was a fantastic chapter in my life and established a quality relationship with a director who I greatly admire. Viva Guillermo del Toro!
All and all, Mimic was a fantastic chapter in my life and established a quality relationship with a director who I greatly admire. Viva Guillermo del Toro!
MIMIC TRAILER
©2012 TyRUBEN ELLINGSON
